Getting into DIY car detailing can feel a bit overwhelming at first, but having the right tools makes all the difference. If you're diving into the world of DIY car detailing techniques for homeowners, start with these essentials that will help you elevate your car’s shine and cleanliness.
First off, you’ll want a good set of wash mitts and microfiber towels. These are gentler on your car’s paint and won’t leave scratches behind. Grab a couple of different sizes: one for washing and another one for drying. Don’t forget a sturdy bucket with a grit guard; it keeps dirt from swirling back onto your mitt while you wash.
When it comes to cleaners, invest in a quality car shampoo that’s safe for your vehicle’s finish. Vinegar might be great for some household chores, but stick to products designed for auto detailing. A clay bar is also a solid addition—it removes embedded dirt and makes your car’s surface feel super smooth.
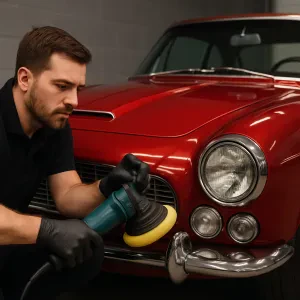
Lastly, protect your hard work with a good wax or sealant. This helps to keep the shine longer and protects your paint from the elements. If you’re really serious about those DIY car detailing techniques for homeowners, consider an orbital polisher. It might seem fancy, but it takes the effort out of polishing and gives your car that professional-grade finish.
Step by Step Cleaning Techniques Revealed
Cleaning your car can feel overwhelming, but with the right DIY car detailing techniques for homeowners, you can easily make your ride shine like new. Let’s break down some simple steps that anyone can follow.
First, gather your supplies. You’ll need a bucket, car wash soap, microfiber cloths, a sponge, wheel cleaner, tire dressing, and a vacuum. Don’t forget your glass cleaner and some interior wipes too. Having everything at hand makes the process go smoother and ensures you won’t miss anything.
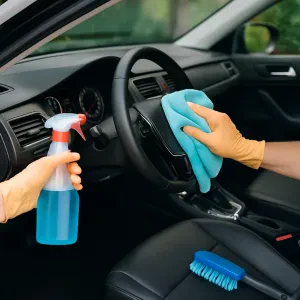
Start with the exterior. Rinse your car to remove loose dirt. Then mix your car wash soap with water in your bucket and wash from top to bottom. This prevents dirt from settling again as you move. Rinse it off when you finish and dry with a microfiber cloth to avoid water spots.
Now, let’s tackle those wheels. Use a dedicated wheel cleaner and a separate brush to scrub away brake dust and grime. Don’t neglect the tires; use tire dressing to give them that fresh, shiny look. It makes a big difference!
For the interior, start by vacuuming the floors and seats. Next, use the interior wipes to clean surfaces like the dashboard and console. Finish off with glass cleaner for a streak-free shine on windows. With these DIY car detailing techniques for homeowners, your car will feel fresh and inviting every time you hop in!
Tips for Maintaining Your Car's Shine
Keeping your car shiny doesn’t have to be a chore. With a few simple tips, you can maintain that fresh-off-the-lot look. Regular cleaning is key. Grab some quality car wash soap and a soft sponge to get started. And remember, avoid dish soap; it can strip your car's protective layers.
Washing your car in the shade helps prevent water spots. Use a two-bucket method: one for soapy water and the other for rinsing your sponge. This keeps dirt from scratching the surface. Once you’re done washing, dry it off with a microfiber towel. It absorbs water like a pro and prevents those pesky swirl marks.
Now, let’s talk about waxing. Aim to wax your car every few months. A good wax can protect your paint from UV rays, dirt, and road grime. It not only makes your ride shine but also adds a layer of protection. You can find easy-to-apply waxes in spray or paste forms—pick one that suits your style.
Finally, don’t forget about the interior! Vacuuming regularly and using a microfiber cloth to wipe down surfaces keeps everything looking like new. For the dashboard, consider using a protectant to keep it from fading. You’ll be amazed at how these little steps can bring your car back to life.
These are just a few helpful tips to nail those DIY Car Detailing Techniques For Homeowners. Give them a shot, and you’ll enjoy a shiny ride that turns heads!
Common Mistakes to Avoid While Detailing
When diving into DIY car detailing techniques for homeowners, it's easy to make a few common mistakes that can turn your car care efforts into a hassle. Let’s break down some pitfalls to watch out for.
First off, skipping the prep work can lead to mediocre results. Always start by washing your car thoroughly. Dust, dirt, and grime build up, and if you don’t wash beforehand, you might end up scratching the paint while waxing or polishing. Grab a good quality car soap, a wash mitt, and a couple of buckets for a two-bucket wash method. Trust me, it’s a game changer.
Another big mistake is using the wrong products. Not all cleaners are created equal! Some household cleaners can damage your car's surfaces. Stick to products made specifically for cars. For example, using a dedicated tire cleaner and a glass cleaner can do wonders. Don’t just grab whatever’s under your sink. Your car will thank you!
Overloading on products is also a common trap. Just because a little wax makes your car shine doesn’t mean slathering on a thick layer will work better. Less is often more. Apply products in a thin layer, and let them do their magic. It'll save you time and give you a shinier finish.
Finally, don’t forget the details! People sometimes overlook areas like the door jambs or under the seats during their detailing session. These spots need love too. Using a soft brush or a microfiber cloth can help get into those nooks and crannies. Paying attention to the full picture makes a huge difference and will elevate your DIY car detailing techniques for homeowners to a new level.