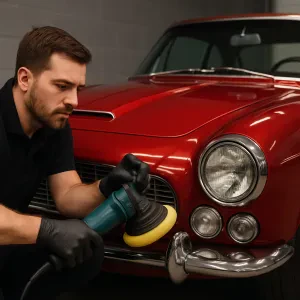
Giving your leather seats some TLC doesn’t have to be a hassle. With the right approach, you can make them look fresh and well-maintained. Here’s a straightforward way to tackle this task, straight from the Leather Seats Car Detailing Step By Step Guide.
First, gather your supplies. You’ll need a soft vacuum attachment, a gentle leather cleaner, microfiber cloths, and a soft-bristle brush. Don’t skip the vacuuming part—start by removing all dirt and debris. Use the vacuum to get into all those little crevices where crumbs and dust like to hide.
Next, mix your leather cleaner according to the instructions. Apply a small amount to a microfiber cloth and work it into the leather in circular motions. This helps lift dirt without damaging the surface. If you have stubborn spots, gently use the soft-bristle brush to loosen them up before wiping with the cloth. Always test the cleaner on a small area first to ensure it won’t cause any discoloration.
Don’t forget to condition your seats! After cleaning, it’s crucial to nourish the leather. Use a leather conditioner by applying it with a clean cloth, focusing on areas that look dry or cracked. This step will keep your leather looking great and help prevent wear over time.
Follow these simple steps, and your leather seats will thank you! Refer back to the Leather Seats Car Detailing Step By Step Guide whenever you need a refresher, and enjoy that fresh, clean look in your vehicle.
Essential Tools for Leather Care
When it comes to taking care of your leather seats, having the right tools can make all the difference. This Leather Seats Car Detailing Step By Step Guide will help you keep your seats looking great and feeling soft. Here are some must-have tools you’ll want to gather before you dive in.
Leather Cleaner: A good quality leather cleaner is essential for removing dirt and grime without damaging the material. Look for something that’s specifically formulated for leather, so it won’t leave your seats dull or sticky.
Microfiber Cloths: These are a game changer for leather care. Soft and absorbent, microfiber cloths won’t scratch your seats and are perfect for applying cleaner and conditioner. Plus, they come in handy for buffing things up at the end!
Leather Conditioner: Just like your skin needs moisturizer, your leather seats need conditioning too. This helps to keep the leather supple and prevents cracks. Make sure to choose a conditioner that’s compatible with your leather type.
Soft Brush: A soft-bristled brush can help get into those tough spots, like seams and crevices. It’s ideal for gently lifting dirt while protecting the leather from scratches.
With these tools in hand, you’re all set to dive into your Leather Seats Car Detailing Step By Step Guide. You'll be amazed at how fresh and new your seats can look and feel!
Step by Step Leather Conditioning Process
Taking care of your leather seats is super important if you want them to last. Here’s a simple leather conditioning process that fits perfectly in your Leather Seats Car Detailing Step By Step Guide.
First, start with a clean surface. Grab a soft brush or a microfiber cloth to remove any dirt or dust. It’s always best to avoid nasty scratches on your leather. Make sure to get into those seams and crevices where dirt loves to hide.
Once your seats are clean, choose a good leather conditioner. Look for one that’s designed specifically for automotive use. Apply a small amount on a clean cloth and work it into the leather using circular motions. This helps the conditioner soak in better and keeps your seats looking fresh.
Let the conditioner sit for a few minutes to absorb. After that, take another clean cloth and buff the leather gently. This really brings out that nice shine and makes the seats feel buttery soft. Plus, it creates a barrier against future stains!
Finally, keep your leather seats protected from direct sunlight and extreme temperatures. Regular conditioning, about every 3 to 6 months, will keep them looking new. Follow these steps, and you’ll have beautiful leather seats for years to come! This process is a key part of your Leather Seats Car Detailing Step By Step Guide.
Maintaining Your Seats for Long Lasting Shine
Maintaining your leather seats is crucial for keeping them looking great and lasting for years. Regular care goes a long way in preventing wear and tear. Start by giving your seats a good vacuum. Get into those cracks and crevices to remove dirt and debris. This step is simple but makes a big difference in how your seats look.
Next, treat your leather seats with a quality cleaner. Choose one that's specifically made for leather. It’s gentle yet effective at breaking down grime without damaging the material. Apply a small amount to a microfiber cloth and work it into the leather using circular motions. This helps lift any stubborn stains while also feeding the leather and keeping it supple.
If you want to keep that fresh look, adding a conditioner is key. A good leather conditioner will keep your seats from drying out or cracking. Look for one that nourishes the leather without leaving a greasy residue. Just apply it evenly and buff it gently with a clean cloth. Your seats will thank you for it!
Lastly, consider using a protectant to shield your seats from UV rays and spills. This extra step can help prevent fading and make it easier to clean up any messes in the future. Keeping your seats in top shape is an essential part of your Leather Seats Car Detailing Step By Step Guide, so don’t skip it! Regular maintenance helps you enjoy that luxurious feel and look for many drives to come.